Snatcher -step by step


- Details
- Published on Thursday, 02 August 2012 08:56
- Written by Dennis Shaw
Most who know me know that I don’t hold much favour with many of the modern “new” patterns. It’s not that they don’t work, it’s just that in most cases they’re not for me. Now and then though one comes along which tweaks my interest. This is one such “new” pattern, or more accurately “style” I use the term “new” tentatively though because the only thing new about it is the shape of hook it is tied on. The style is really just a simple variation on the bumble/palmer/dabbler theme. That’s not to detract from its obvious charms though. The inspired choice of hook makes for a most striking fly. I’m sure much of its success is down to the fact that it just looks right, and if a fly looks right you will fish it with more confidence and this confidence is usually rewarded with more fish.
Because it is a style rather than a pattern, there is so much you can do with it. You can give it a head hackle, either to blend in with the overall colour of the fly, or as a contrast to the rest of the fly. You can give it cheeks, or you can add both, as I have done here. Or you can tie it as a simple palmer. The choices are only limited by your imagination.
What I have done with this one is take one of my favourite “fancy” flies, the Dunkeld, and tied it snatcher style. I hope you like it, I know I do and I’m sure the fish will too.
Instructions assume right-handed tyers
Materials list
HOOK– Kamasan B110 #12
THREAD – Orange UTC70
BUTT – Orange Glo-Brite Floss(#8)
RIB – Gold Wire
BODY – Flat Gold Tinsel
BODY HACKLE – Orange Cock (not genetic)
CHEEKS – Jungle Cock
HEAD HACKLE – Dyed Brown Guinea Fowl
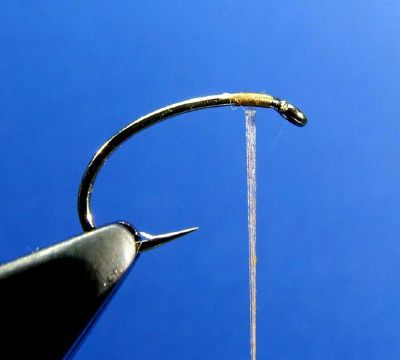 |
STEP 1 Attach the thread. Leave plenty of room here at the head if you intend adding cheeks and/or a collar hackle. |
 |
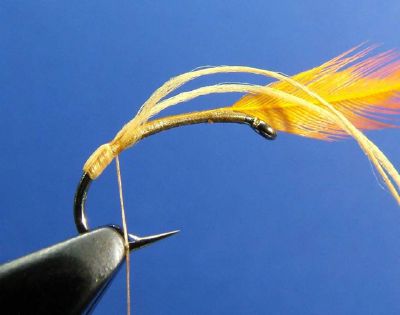
STEP 2 Tie in the orange cock hackle with the shiny (convex) side towards you. |
 |
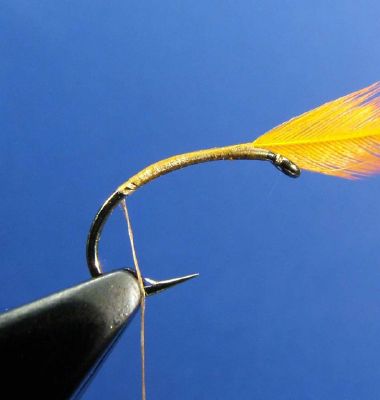
STEP 3 Wind the thread down round the bend and catch in the floss for the tag. Tie it in so that you have a length of floss extending past the bend and over the eye. Return the thread one turn past (to the right) of the tag extending over the eye. |
 |
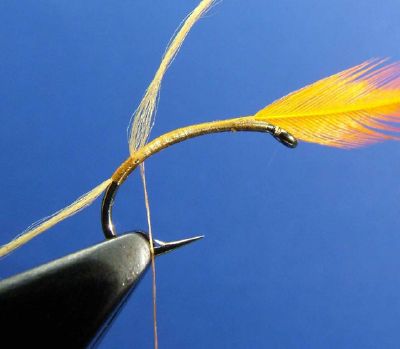
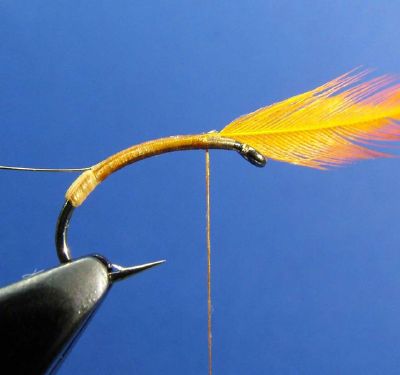
STEP 4 Wind the tag which extends over the eye down to the other tag-end and then back to where you parked the thread and tie off |
 |
STEP 5 Take the tag which extends past the bend and pull it over the top of the butt and tie it off. This method of tying in the butt adds durability. |
 |
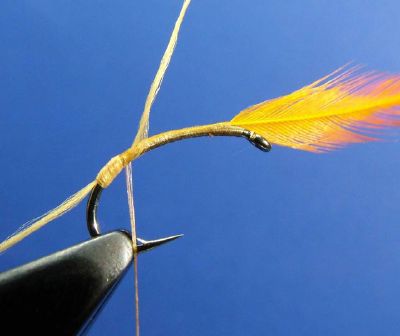
STEP 6 Catch in the ribbing material and wrap the thread back up the body. Stop two turns short (to the left) of the hackle. |
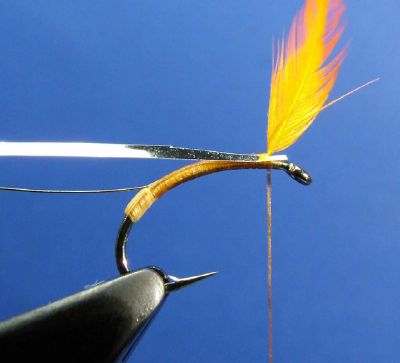 |
STEP 7 Trim the tinsel to a point and tie in with three turns of thread. Two turns before the hackle and one turn after (to the right) of the hackle. By tying in the tinsel like this you help reduce the number of turns at the head of the fly, which in turn reduces bulk. |
 |
STEP 8 Wind the tinsel down to the butt and back up to one turn past the hackle in touching turns, and tie off. |
 |
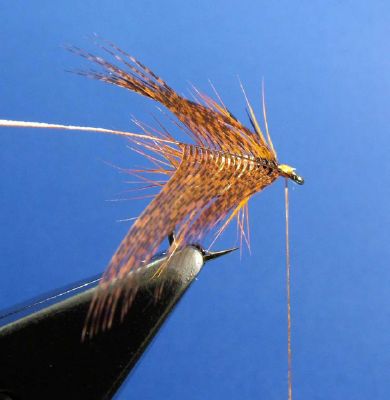
STEP 9 Wind the hackle in open turns down to the butt. |
 |
STEP 10 Return in the opposite direction with the wire rib and tie off at the head. Snip out the hackle tip and twist the waste wire off. |
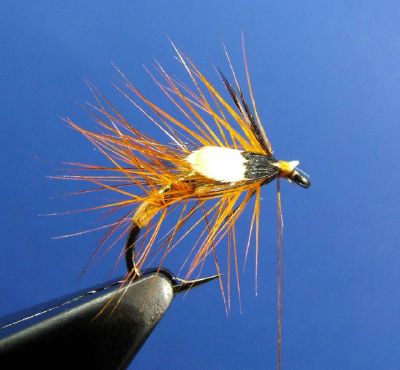 |
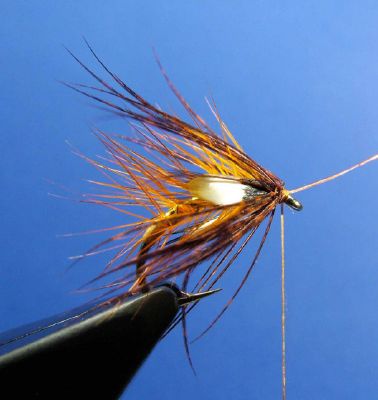
STEP 11 Tie in the cheeks, one on each side. If you prefer you can tie the cheeks in after the head hackle |
 |
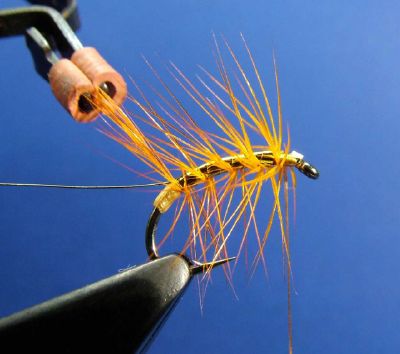
STEP 12 Tie the head hackle in by the tip. |
 |
STEP 13 Wind the hackle in touching turns. Sweep the fibres back after each turn and tie off. |
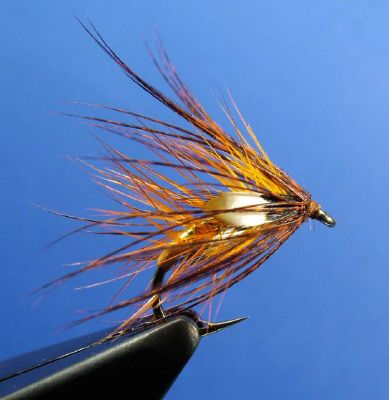 |
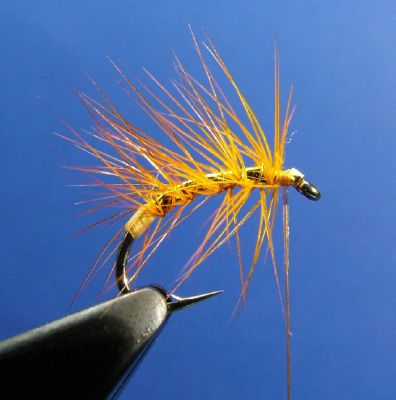
STEP 14 Finally, trim the waste, whipfinish and varnish for the completed fly. |
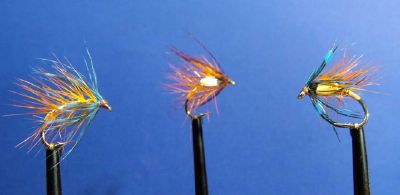 |
A couple of examples of variations. The original is in the middle. On the left is one with no cheeks and a blue dyed Guinea Fowl head hackle. On the right is one with the same blue head hackle and Jungle Cock cheeks. |
Dennis Shaw was born into a fanatical fishing family at Dalbeattie in Southwest Scotland. He graduated from the local "Barr Burn", with the proverbial cane, wool and bent pin for eels, to fishing the local rivers and lochs. Now married with a son and daughter and fishing the chalkstreams of Southern England, Dennis is always yearning for "home". He has been tying flies for over 35 years yet still learns something new every day.